Front End Loader Wall
My youngest son loves construction trucks, so when I was thinking of a theme for his room, this was the first thing that came to mind.
Since he needed a new ‘big boy bed’ anyway, I looked at these really cool ‘truck beds’ that you could make with lights and a steering wheel and all the bells and whistles – literally! However, the more renovations went on in the house, it was apparent that we wouldn’t have time to make a bed like that anytime soon, and, even if we did, it would take up most of his room, leaving him almost no space to play. Not to mention that it wouldn’t really be practical for very long and would have to be completely assembled in his room, then disassembled to come back out.
Now, we had the same carpet installed in the entire upstairs of the house, except in the bathroom of course, and he decided he wanted a blue room like his older brother, which didn’t exactly go with my ‘construction’ theme, but it is what it is when you leave decorating decisions to a 3 year old (this was over a year ago now when we painted and had carpet installed).
I had this thought that if we put the bed in that offset area, we could put a bulldozer on the wall and have the bed be in the ‘bucket’ of the dozer. My son later corrected me to tell me it was a front end loader and not a bulldozer….well, ok then:)
So, with his room layout, there was an alcove on wall next to his closet that was just long enough for a twin mattress plus maybe an inch or two, but no room at all for a headboard or footboard, so buying a traditional twin bed was out of the question. We decided to build him a platform bed for that space since it would leave the most amount of open floor space for him to play. I just did a quick search on Google for ‘how to build a platform bed’ and watched a few tutorials. It was pretty simple and we already had some of the wood we needed to make it. We used a 4×4 post for the 4 corner supports, then, it was just 2×4’s for the four sides. Then we also added a 2×4 down the center, lengthwise, for extra support – not that a toddler would ever jump on a bed… Last we used 1×3 slats that we just spaced out every few inches across the top of the 2×4’s. Honestly, I don’t have any pictures of making the bed, but it was very simple to do and only took a few hours to make it.
I searched and searched for some sort of large wall stickers, something to use, but no luck. Any construction type wall stickers were very cartoonish and they were all too small for what I wanted to do. I figured if it was going to happen, it would have to be painted on.
Now, I had never done any kind of wall mural or any freehand painting on a large scale other than just painting walls a solid color, so, I tried to find someone that thought they could paint this bulldozer/front end loader on the wall. No luck. So, my next thought was to use a projector and set it up so I could trace it on the wall. Well, time went on and maybe it was just me being afraid to tackle it, or just the day to day business of life, but it didn’t happen for quite a while. So, finally after I left my job, I decided I would tackle this beast before he got too old to enjoy it!
I found an image online that was from one of his story books (JCB Diggers).

Then, I went to Lowes to get the paint I needed. I ended up with a bright ‘construction’ yellow, which I actually bought a quart of with the intention of painting a dresser eventually for him (that project is still on the list at this point), a glossy black and a small sample of a light blue (for the interior of the cab so it would be a little different than the blue on his wall). I also bought a yard stick so I had something light weight that I could use for a good straight line.
I got a pencil and figured the worst that could happen would be that I’d have to repaint his wall. I started with the bucket which seemed like it would be the simplest thing. It was just a straight line across the back and then I angled it down to meet the corners of the front side of the bed. I went ahead and painted that with the black gloss so it could dry and I could put his bed back in place to work on the rest.
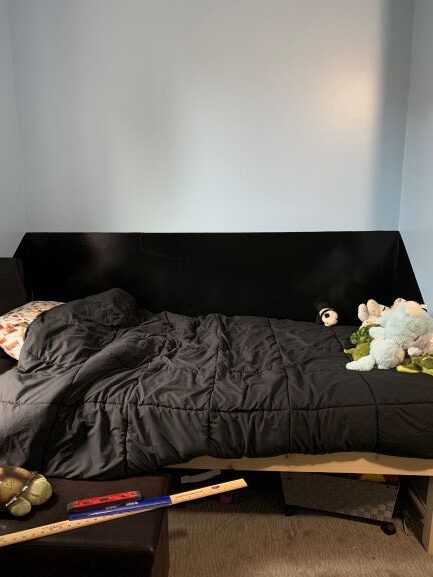
Next I found the center of the wall and just made some marks on where I wanted the outer lines of the front of the dozer, and how high I wanted it to be. I knew the cab had to be the largest part and I wanted it to take up most of the height of the wall, so I just factored out what measurements to use based on the width and height of the wall. Honestly, I don’t even recall the measurements now since I kind of made them up and divided out while I was sitting up there. I used the yard stick to make the straight lines, and then just freehanded the corners to be a little rounded. I then traced the outer edge of the interior part of the ‘grill’, penciled in the mirrors and upper part of the cab. Once I had all the outer edges done, next was what I thought would be the easiest part – the facial features – WRONG! I must’ve traced the eyebrows 10 times and erased them before I finally decided that I needed help to make this even. I like things to match, line up, be even and this just wasn’t happening.
So, I went to my computer, opened a new Word document and went to Insert, selected Shapes and found something that would work for eyebrows, eyes, and I went ahead and pulled up a rectangle for the ‘lights’ on the top of the cab, I just clipped the corners a little rounded for those and set them aside for later.
After I printed a few to get the size I wanted, I just cut them out and traced. SO – MUCH – EASIER!
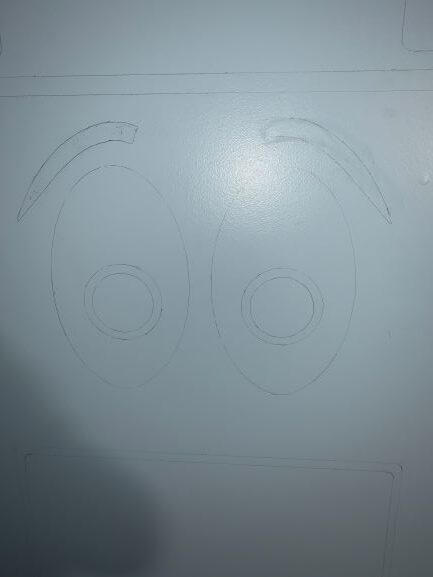
Next came the painting. I started with all the sections that would be black. I did have to use small artists’ brushes on most of the parts, so it takes some time, and a few coats, but in the end it’s worth it.
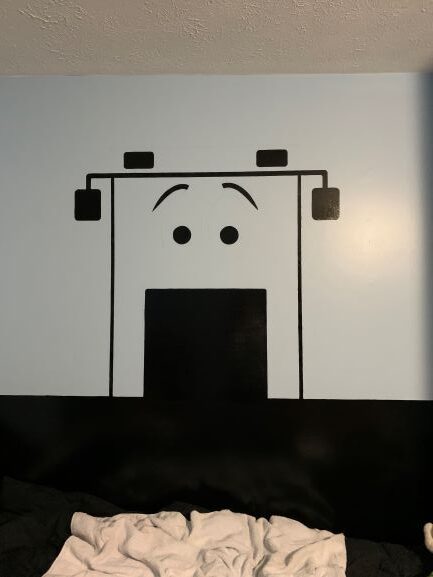
Then, I painted all the yellow portions.
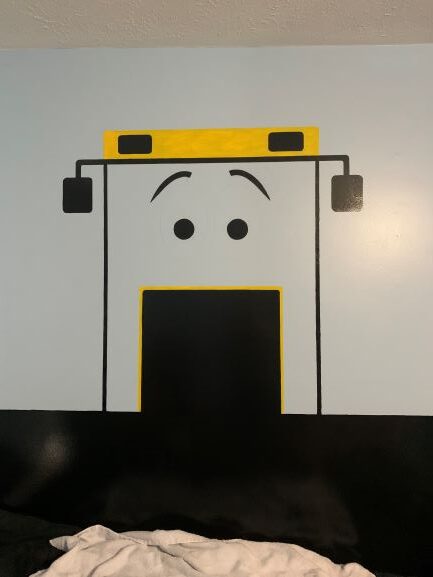
Then, I painted in the white around the eyes.
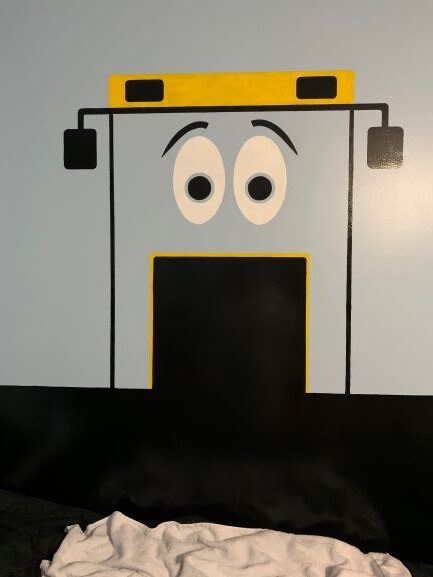
Lastly, I painted the blue interior cab section. While I had this blue out, I added a little darker blue craft paint for the blue eyes.
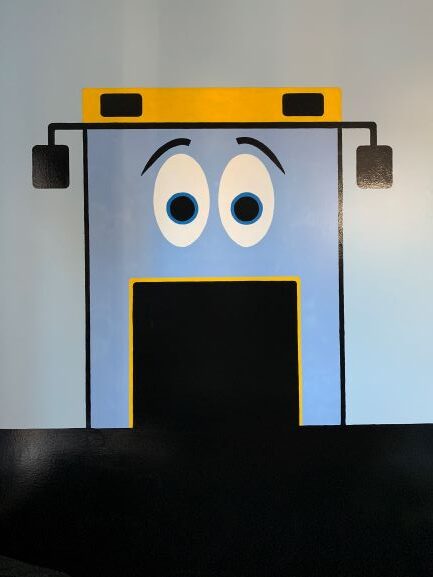
Keep in mind that all of the colors, except the black, took several coats, so this was over a time period of a few weeks to get this completely finished.
For the lights above the cab, I had some silver label pages left over from another project, so, I used my rounded edge rectangle I had printed previously and traced them out, cut them and simply peeled off the backing and stuck them on the wall!
The last thing to do was the grill itself. I thought and thought about how to do this and make it look right. I thought about getting something to make a stencil. I thought about using thread or string. In the end, I decided to get a silver paint pen and use the yardstick as a guide. I measured out as even as I could get and made small marks on the top, bottom and on both sides of the grill, then placed the yard stick up at an angle and marked along with the paint pen. It worked for the most part. I did have to go back and do some touch up painting where it smudged or went over the lines. But, again, unless you got up really close and stared at it, you might have never noticed anyway.
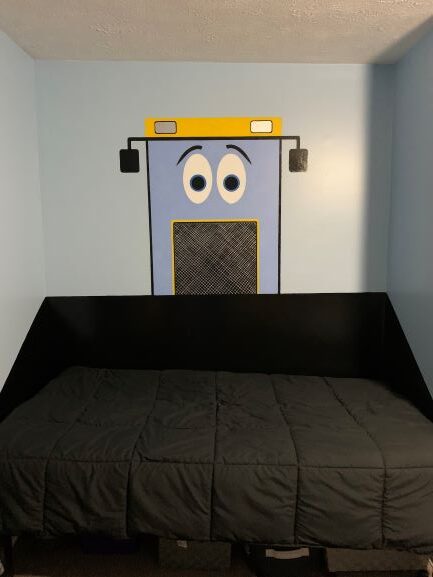
Now that the painting was done, a dozer bed wouldn’t be complete without some ‘rock pillows’! I went to Joann’s and found a faux rabbit fur in grey that was on clearance – perfect! I got 10 yards of it because at that point, I had no idea exactly how much I would need. I also purchased some cotton batting (6 bags) because I really wanted irregular shapes for the rocks. In the end I decided to do one long piece with some taller and some shorter tops that could go against the back of the wall along the back of the bucket. This served two purposes – 1) it looked like a pile of rocks in the back of the bucket, and, 2) it stopped my toddler from rolling between the bed and the wall at night!
I laid out the material and folded it over, right sides facing each other inside, then, pinned around in a haphazard up and down pattern. After I had it pinned, I cut it, leaving about a half inch on all edges. Next, I just stitched it on the machine with a straight stitch all the way around, leaving only short side open to stuff it. I did have some material left over, so I decided to cover two throw pillows that came with our couch that I really didn’t care for and weren’t being used. I just laid the pillow on top of the material that was folded over inside out and cut around, leaving a few inches on all sides to allow for the width and then stitched the three sides, flipped it right side out, and fit the pillow in. After flipping and stuffing the larger free-form pillow and the two throw pillows, I hand stitched the open edges closed. Now, with the faux fur, a simple straight hand stitch wouldn’t work (I guess I needed thicker thread), so I had to do a crossover stitch. I used grey thread to match, and the faux fur mostly covers the thread, so unless you pick them up and look for it, you’d never see it!
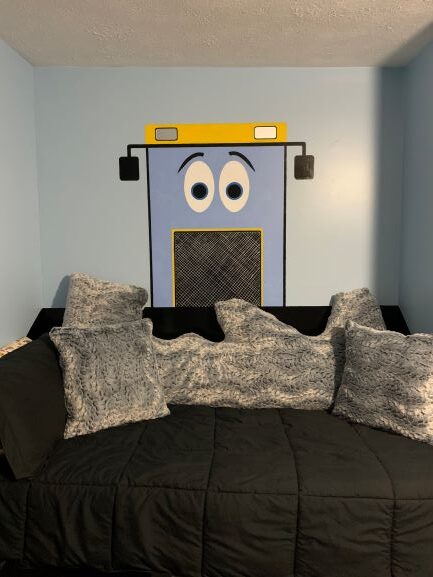
I think it turned out pretty good, and my son likes it, so that’s the important part! I do think it needs something else on the wall though, maybe some clouds or trees or something else in the background, but this works for now and now that I have it done, I don’t know why I put it off for so long! If I can do this, anyone can!
