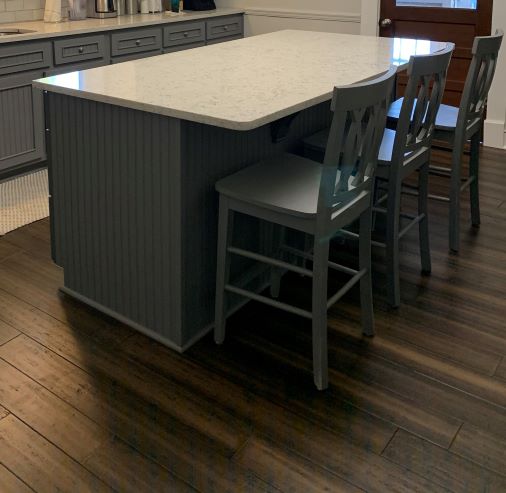
Building a Kitchen Island
When we bought our house, one of my favorite things about the house was the large kitchen. It had always been used as an eat in kitchen with a small table, but my first thought was I CAN HAVE A BIG KITCHEN ISLAND!!
When it comes to building an island, you can really go as large or small as you want, basically, whatever your space allows for. Now, we had a good amount of lower cabinets, and planned to add upper cabinets along the long wall in the kitchen, but with no real pantry space in the house, really, can you ever have enough storage in a kitchen??
There was also no dishwasher in the existing kitchen, so rather than cut away existing cabinets, we decided to build the dishwasher into the island. Now, for that part, make sure you have someone assist that knows electrical and plumbing. At first, my husband told me it wasn’t possible, that we had to have a sink to make the dishwasher drain properly (details…details). I wasn’t having it. I wanted a large flat surface, so he figured out a way to run the electrical and water lines using a special drain/vent so we didn’t have to add a sink to the island (I promise I did not say ‘I told you so’….but I’m sure I wanted to:)).
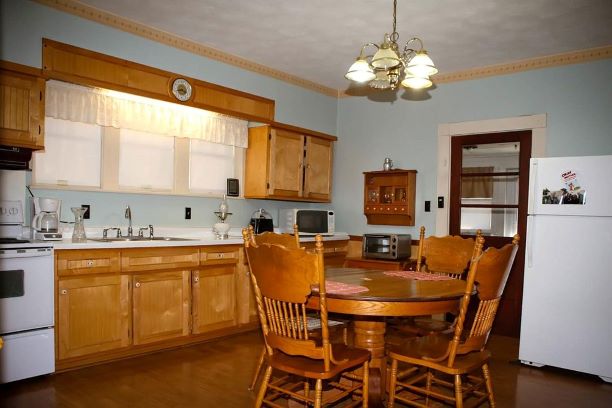
Once we had the old laminate wood floor removed (we were putting new floors in the entire downstairs of the house), and the chimney down where we were making space for the fridge to sink in the wall, we were ready to get to work on creating the footprint for the island.
We measured out where we wanted the island placed by making sure we had plenty of space from all sides, taking into account that we eventually may need to replace/move appliances (which was a good thing since our fridge bit the dust not long after this). I also brought the dishwasher in and sat it approximately where it would go and opened the dishwasher door to make sure there was enough space to not only open the door, but also leave about a foot and a half between the open door and the opposite wall base cabinets to walk thru when putting dishes away (our previous house the dishwasher was in the corner and you couldn’t get around it to put things in the cabinet, so I wanted this to be a better placement and easier to use in the long term).
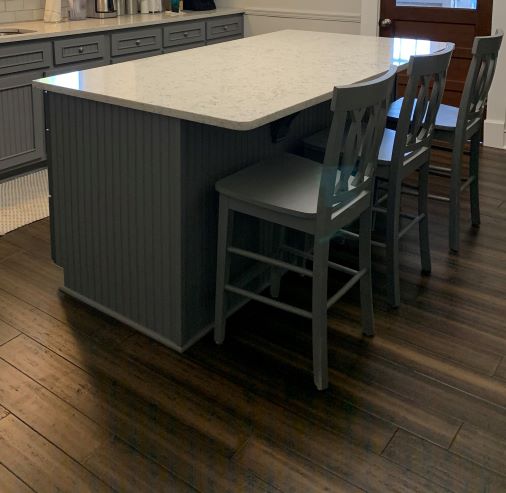
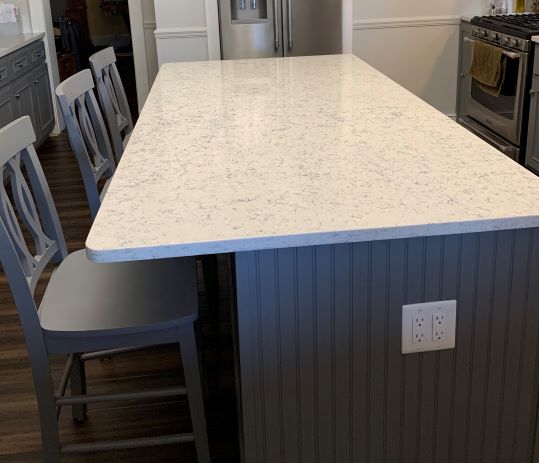
For the side nearest the back door, we knew we needed enough space to get through comfortably, and since the laundry room was in the mudroom off the kitchen, we had to get thru with a laundry basket:). For the back side of the island, I wanted to be able to have enough space for barstools, but still walk through comfortably. So, with the depth of the cabinet, we were able to have about a 12 inch overhang on the countertop, have barstools and still have good space to walk thru the area even when someone was sitting there. There was also enough room to get appliances/furniture thru if needed.
Basically, our entire island would end up being roughly 6.5 feet long by about 3.5 feet wide (this included the 12 inch overhang)….FABULOUS!!!
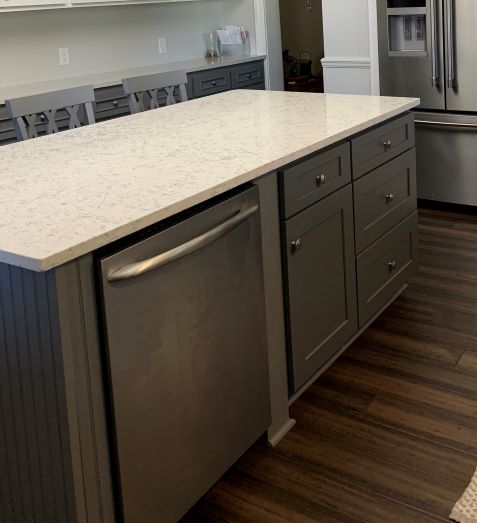
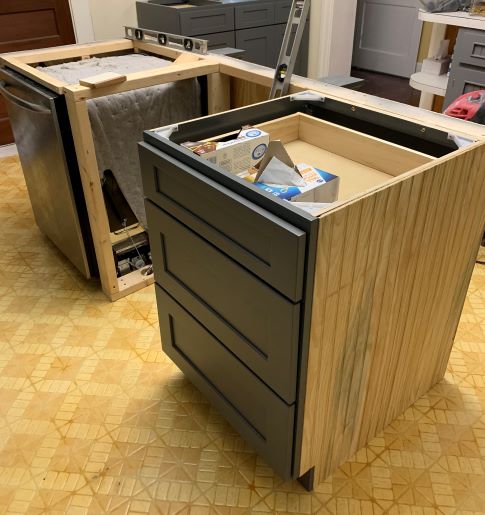
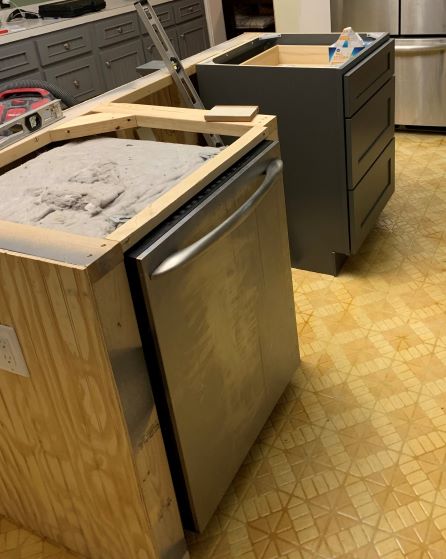
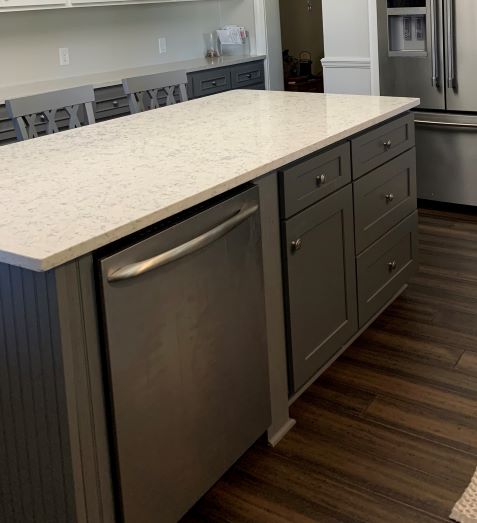
We started with one 24 inch pre-fab drawer base cabinet on one side and the dishwasher on the opposite side (nearest to the cabinets with the dishes we used most). Between the two, we initially planned to do open shelving for crock pots, etc., however, we had enough space above the fridge to make a hidden storage area for those items since we didn’t use them frequently anyway, so we decided to purchase another standard 18 inch pre-fab base cabinet. Of course the cabinets take a few weeks to come in, so we had to get going with just the one at first.
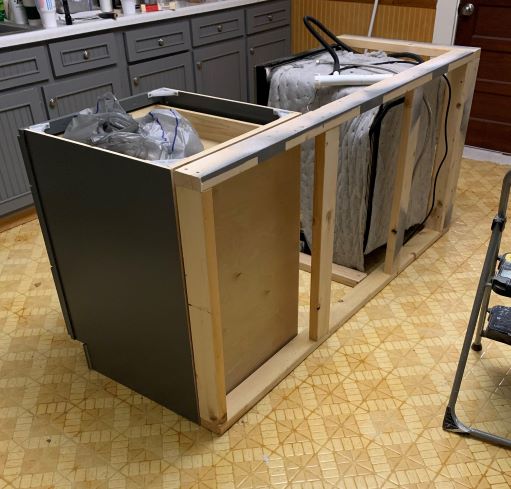
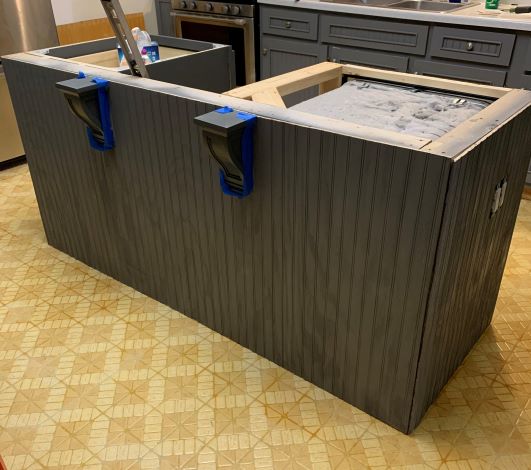
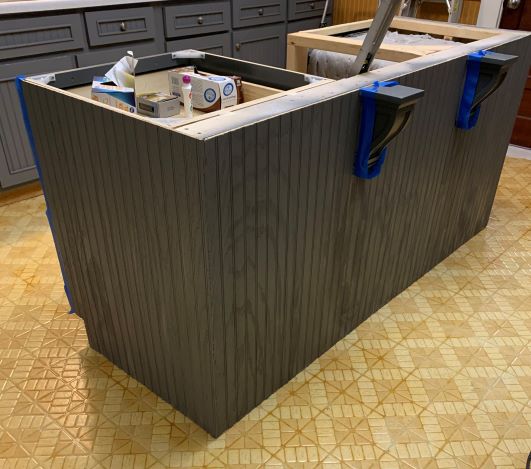
Once we had the cabinet and dishwasher set roughly in place, we built an ‘L shape’ frame around the back of the cabinet and down the side of the dishwasher. For this we used 2×4’s down the floor, up the side and across the top to create the frame. Knowing that the countertops could not sit ‘on’ the dishwasher, we had to have the support all the way around, so we ran another set of upper, lower and vertical 2×4’s down the other side of the dishwasher as well, leaving space for the 18 inch cabinet we ordered.
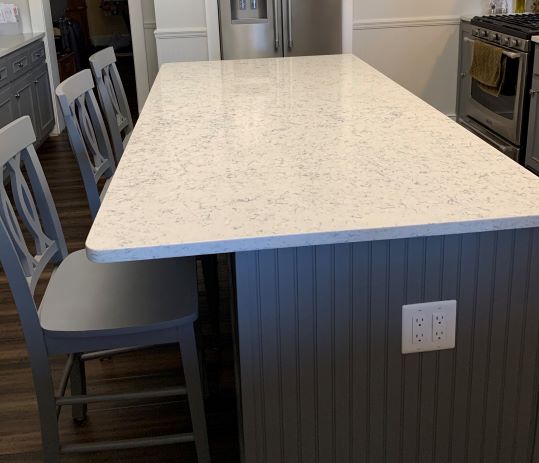
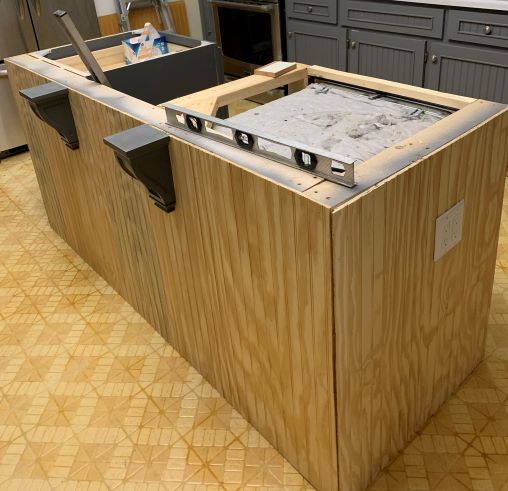
Next, my husband ran all the electrical and water/drain lines for the dishwasher and I had him install a double outlet on the far end of the island. We debated about a single, but I’d rather have extra just in case. It’s definitely been a bonus to have the 4 plugs vs. 2, so if you are in the process, go with more if you can!
When installing the frame and cabinets, make sure you are checking your surface for level and square as much as possible. We used shims under the cabinet where needed, and between the cabinets/frame. Our house is old and nothing is square or level, so it’s a matter of getting as close as possible in most instances:)
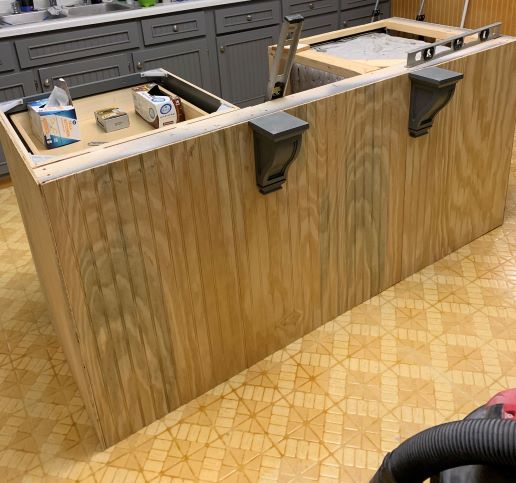
Next, we used bead board around the sides and back of the island, and on both sides of the dishwasher front (to hide the 2×4’s). We then installed the cornice pieces I purchased when I bought the cabinets to give extra support to the island countertop and I painted the bead board to match the lower cabinets.
Then the countertops were installed. I chose a quartz countertop that would match the color scheme in the kitchen. We went with quartz because of the durability, lack of maintenance, and the smooth surface it provided. No sealing, no worrying about cutting on it or sitting hot pans on it or even greasy pizza boxes, and cleaning is super easy!!
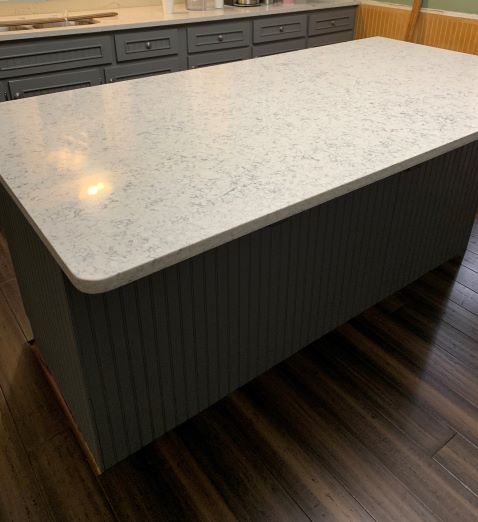
After we got the flooring installed, we then measured, cut and painted the wooden corner molding on three corners. On the corner that butted up next to the pre-fab cabinet, we had just cut the bead board to run down the lip of the overhang, so a corner piece was not needed there. Last, we installed ¾ inch quarter round base trim around everything but the dishwasher (I’m not a huge fan of rounded molding, but it’s what was already existing in the kitchen and since there was a custom rounded piece at the end of one section of the cabinets, I thought it best to go with it for now until I figure out how to bend molding:)).
I can say that I absolutely LOVE my island and it has become so much more than a baking/prep surface. It is a place where the kids sit and snack or eat breakfast on occasion, it’s become a project work surface, it’s become a homework area, and it’s the PERFECT height for standing to wrap gifts with no bending and leaning:) It is one of my favorite pieces in the house so far and I can’t imagine having a kitchen without a big island ever again!!

