DIY Window Slider
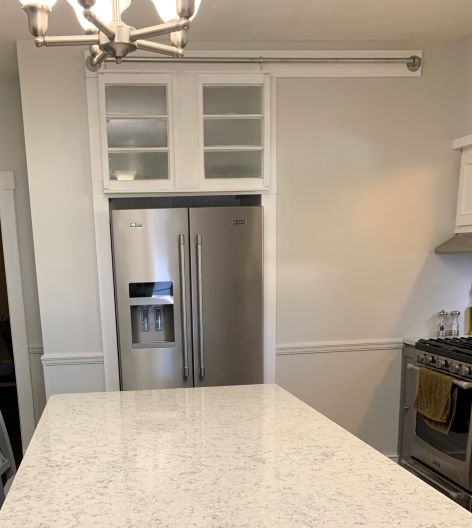
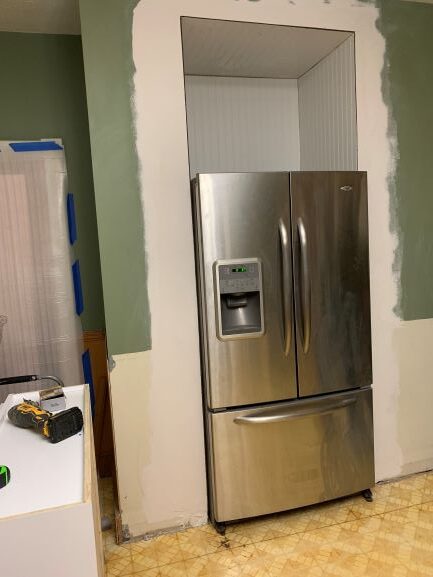
When we were in the process of renovating the kitchen, we removed the walled up chimney to make room to sink the fridge in the wall. This gave us an entire corner in the kitchen to use for more cabinets!

With the space added to sink the fridge, we also added some ‘extra space’ above the fridge for storage, so we added a simple plywood shelf and trimmed the front with a 1×4 to match the other trim on the opposite wall of the kitchen.
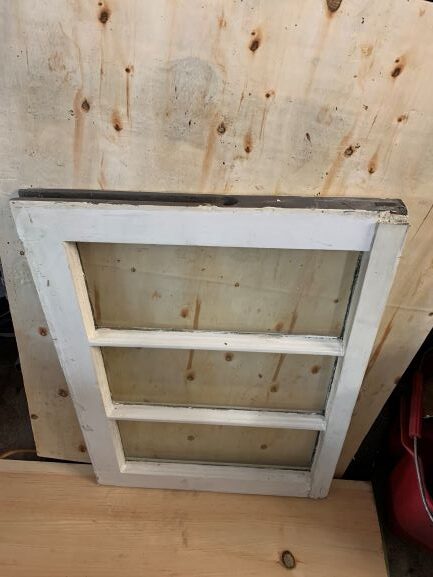
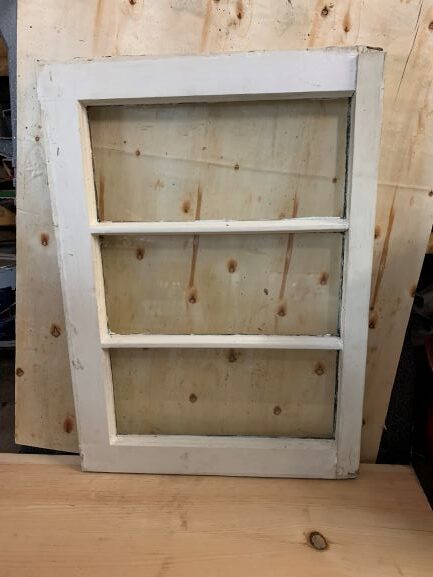
To cover, or ‘hide’ this space, I decided to use the old windows we had replaced in the kitchen. My husband wanted to put regular cabinet doors up there, but, I wanted to tie in something from the original house and I really liked the look of the windows (I wish we could’ve kept them, but you could feel the breeze coming straight thru so they had to be replaced). We determined we needed to cover just over 36 inches, and our windows were not nearly that big, so, my husband attached two windows by adding a 2×4 to the center, then a thinner piece of wood on top (which would be the front of the piece).
I sprayed the back of the glass on the windows with a frosted spray paint so that the crock pots or whatever else we stored up there wouldn’t be seen, then, I used 3 coats of white chalk paint to paint the entire piece. I also caulked the front where the glass met up with the wood just to clean it up a bit because you could still see some of the darker areas of deterioration between the wood and the glass.
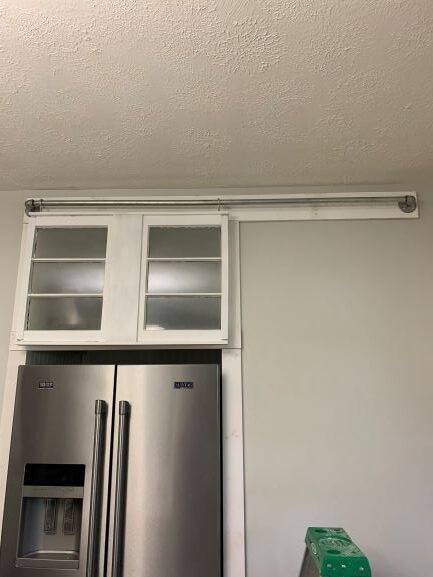
Next, I looked at getting barn door slider hardware, but I just couldn’t see spending $200 on something that was only going to be used on occasion and for a storage area and not an actual ‘door’. So, I saw something somewhere in a search where pipe had been used to make a slider. My husband ended up picking up a long section of galvanized pipe (just make sure it’s twice as long as whatever opening you’re covering so the door will slide fully open). We also got the corner pieces and flanges to attach them.
Now, of course none of this lined up with a stud and the windows were pretty heavy, so back to Google I went…. After some searching, I saw where some people had used a solid board to attach their slider hardware to, and then attached the board to the wall, so that’s what we did. This worked out too as far as sliding ‘over the trim’, which was another issue when trying to figure out how the slider would work in that space. We used a 1×6, marked where the flanges needed to be, then found the studs and attached the board to the wall.
To attach the window piece to the pipe, we used two large eyehooks. This meant that the whole piece had to be slid onto the pipe, then, the corner pieces and flanges attached. Next, we had to raise the entire piece and attach it to the board! Again, this piece was heavy, and I’m not the tallest person, so even on a ladder, even with the marks on the board where to place the screws, this was not the most fun 10 minutes of my life:) However, I love how it turned out and I think it’s a unique piece that ties in the old and the new, but is also functional.
This is definitely not something I would suggest for anything requiring daily, or even frequent use because it’s pretty loud when you slide it back and forth (though, I’ve learned that if you push up just a little so the eyehooks aren’t scraping on the gas pipe, it’s not that bad). Maybe there’s another option out there (some sort of hook with the beads that would roll easily would be perfect, but I’ve not yet found any that would be strong enough to hold the weight), but that’s what we could find at the time and it works for what we need it for!
I still haven’t decided if I want to distress it, so I haven’t waxed it yet. I also haven’t decided if I want to add a handle of some sort. I figure those things will come to me over time, or, if not, it will stay as it is:)

